

Below is the date when this post is last modified. This post will be kept updated if further recommendations are found.
We all had this feeling at least once, or at least, I had. 😛 I install a Linux system, I install some package to fix an issue/add a feature/whatever, and now the system feels messed up… It’s probably not, but the feeling that it’s fresh and clean is now completely gone – reinstall, sigh. This is part of the reason I sometimes switch back to Windows for a while, since although Windows never felt clean, it worked out of the box for a lot of things. But I always liked Linux – So switching my OS again this time, I wanted to do it right.
And doing things right means a unified procedure and good documentation. This will be the page where I will be documenting setup steps and recommendations for a new system to get things set up and working smoothly if they don’t out of the box. In case there are more good suggestions, I will try to add them as soon as possible. I will try to refer to the sources as accurately as possible, but it’s not rarely that I forget some things. Please excuse me for this… 😛
As of 13th of June, my system (NVIDIA GPU) is running Fedora 40 Workstation, which runs nicely with configuration changes below. In fact, some changes might even be beneficial for other distros having the same problem! Feel free to test and report back.
NVIDIA-specific workarounds will be indicated, and are only required/recommended when actually using an NVIDIA card. AMD and Intel folks should be able to safely skip the relevant sections. Anyways, let’s dive right in!
Step 1: Update!
This is the most simple step, but very important since dependencies can only be fully resolved if the packages are on their latest version. Either do this in GNOME software center, or in the terminal with:
sudo dnf update -yJust to make sure that you are on the latest kernel after the update, make sure to reboot after running the command.
Step 2: [NVIDIA] Enable RPM Fusion
Since Fedora doesn’t ship proprietary stuff by default, we need a third-party source named RPM Fusion to get our NVIDIA driver packages. If you clicked “Enable Third-Party Repositories” at the post-installation prompt, you should have RPM Fusion’s NVIDIA repository enabled already, which is all we need for now. For everyone else, or for those wanting to make sure, an easy way is to go to GNOME Software Center -> Software Repositories and at least enabling the NVIDIA Driver option.
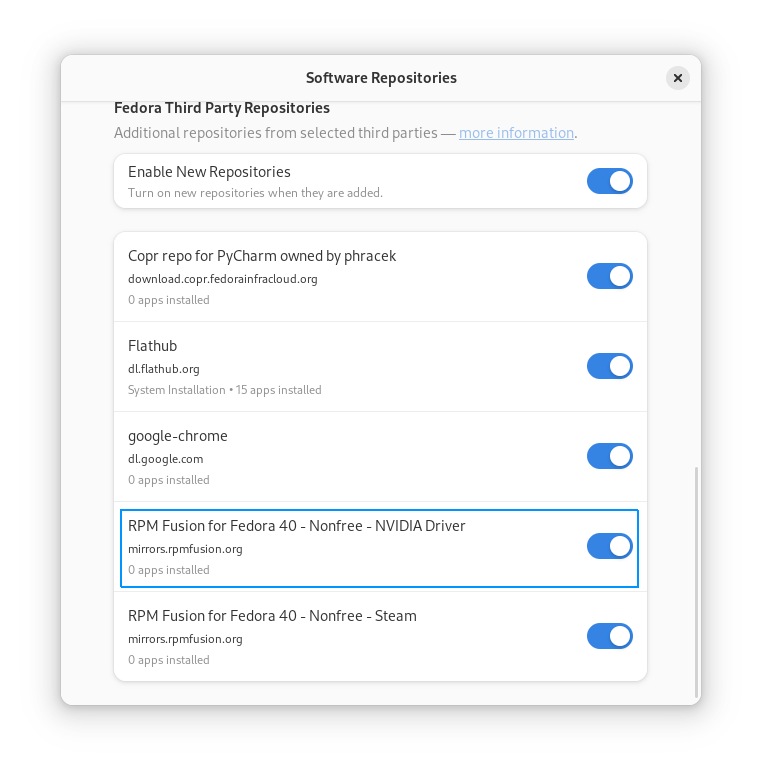
Another option would be following the official RPM fusion guide.
Step 3: Fix GRUB
Well, there is nothing wrong with GRUB (the bootloader in Fedora) itself, but you may have noticed that the boot selection screen is weirdly stretched after installation. Fedora, for some reason, ships GRUB with GRUB_TERMINAL_OUTPUT set to console by default. Make a backup of the original /etc/default/grub, and change the original file so the related line looks like this:
GRUB_TERMINAL_OUTPUT="gfxterm"This way, GRUB should load in graphical mode and the resolution should be right. While we’re at it, why not install a GRUB theme to make your boot screen look a bit nicer? One theme I can recommend is Distro GRUB Themes, which has variants for a lot distros and hardware manufacturers. Plus, they look really nice!
Extract the contents, make the directory /boot/grub2/theme/ and copy the contents there. If your root partition isn’t encrypted, you can theoretically just leave the contents somewhere in your home directory and adapt the GRUB_THEME line below… But come on. 😛
Add this line to your /etc/default/grub:
GRUB_THEME=/boot/grub2/theme/theme.txt[NVIDIA] Step 3.1: Add KMS
For Wayland and Plymouth and stuff, it’s important to set the parameter nvidia_drm.modeset=1 for Kernel Mode Setting when the module is loaded. Now, according to RPM fusion, this parameter is enabled by default, but I noticed some differences in behavior when I explicitly set the parameter in the kernel command line in GRUB. If this isn’t required, please let me know, but I think there is some benefit when the parameter is set as early as possible…
Change the GRUB_CMDLINE_LINUX line and add the bold part:
GRUB_CMDLINE_LINUX="rd.driver.blacklist=nouveau modprobe.blacklist=nouveau rhgb quiet rd.driver.blacklist=nouveau modprobe.blacklist=nouveau nvidia_drm.modeset=1"The parts before the modeset part can be ignored, they should be set automatically after installing the NVIDIA drivers, which will be covered later.
Now, your file should look something like this (changes will be marked bold):
GRUB_TIMEOUT=5
GRUB_DISTRIBUTOR="$(sed 's, release .*$,,g' /etc/system-release)"
GRUB_SAVEDEFAULT=true
GRUB_DEFAULT=saved
GRUB_DISABLE_SUBMENU=true
GRUB_TERMINAL_OUTPUT="gfxterm"
GRUB_CMDLINE_LINUX="rd.driver.blacklist=nouveau modprobe.blacklist=nouveau rhgb quiet rd.driver.blacklist=nouveau modprobe.blacklist=nouveau nvidia_drm.modeset=1"
GRUB_DISABLE_RECOVERY="true"GRUB_ENABLE_BLSCFG=true
GRUB_THEME=/boot/grub2/theme/theme.txt
Only use this to compare to your own configuration. If everything is set, apply these settings…
We will first make a backup of the old grub.cfg file (which I believe is a script sort of thing that GRUB executes upon start), and then generate a new one:
sudo cp /boot/grub2/grub.cfg /boot/grub2/grub.cfg.bak
sudo grub2-mkconfig -o /boot/grub2/grub.cfg
grub2-mkconfig should confirm that a theme has been found (if you set up one) and that Windows has been detected (if you keep Windows around, of course). To test, simply reboot and see!
Step 4: [NVIDIA] Install Drivers
Now we can finally install the NVIDIA drivers. While you should be able to search for NVIDIA in GNOME Software Center and results should appear, it only worked for me once and I couldn’t find anything to install with the GUI way. But what works every time is installing them with the Terminal. For this, I followed the official RPM Fusion guide, but here are the essential commands you need for most cards, taken from the guide:
sudo dnf update -y # and reboot if you are not on the latest kernel
sudo dnf install akmod-nvidia # rhel/centos users can use kmod-nvidia instead
sudo dnf install xorg-x11-drv-nvidia-cuda #optional for cuda/nvdec/nvenc support
After rebooting, you should have 3D acceleration and all the stuff. Note that for older cards, you need other steps. For those, you need to check the official guide since the steps can vary based on the series.
[Update] June 23rd, 2024: In case that after a reboot, you get a message saying that the system is falling back to the nouveau driver, try to run these commands from this StackOverflow post:
$ sudo depmod
$ sudo dracut -f # perhaps this as well
Step 5: [NVIDIA] Add to Dracut/Plymouth Fix
This problem becomes more apparent if you have an encrypted root filesystem and need to enter your passphrase. After setting the nvidia_drm.modeset parameter, you have probably noticed that the passphrase screen is now completely broken. Also, Plymouth also doesn’t really show up anymore, it’s just your OEM logo up until GDM (login screen) shows up. The easiest way I found to fix this is to add the NVIDIA modules to the initial RAM filesystem, or initramfs for short. Fedora uses Dracut to configure the initramfs, so we will create a file at /etc/dracut.conf.d/nvidia.conf with the following content:
force_drivers+=" nvidia nvidia_modeset nvidia_uvm nvidia_drm "After that, run this command to regenerate the initramfs:
sudo dracut -fThese were some interesting articles I found during research:
https://www.if-not-true-then-false.com/2015/fedora-nvidia-guide/2
https://wiki.archlinux.org/title/NVIDIA#Early_loading
Software Sources
If you’ve made it this far: Congratulations! Everything should be working now, and now we can move on to optimizing. Before you install other software though, there is one thing you have to keep in mind – especially when coming from other distros: Fedora does not include proprietary software. And in my experience, this kind of extends to media codecs, so you might have some weird problems with video playback etc. when installing stuff from the official RPM repositories.
[Update 13th July, 2024]: Actually, there is a very good way to install proprietary media codecs. Keep reading…
Now, if you want maximum functionality, make sure Flatpaks from Flathub are enabled in GNOME Software Center -> Software Repositories. The software on Flathub is generally a bit more open to proprietary software/libraries/codecs, so you experience less issues in general. Plus, you get rolling updates of software you want since you don’t have to wait for Fedora to package the new version and release it, not to mention that Flatpaks are sandboxed enviroments, which enhance security and maintainability in general. That’s why I love to check if there is a Flatpak/Flathub version of my software, before falling back to the unsandboxed RPM variant.
You might have noticed Fedora Flatpaks. I generally just disable them, because they’re basically the same software distributed in the Fedora repositories, but packaged as, well, Flatpaks. Those are intended for immutable Fedora versions like the Silverblue variant, so it makes little sense to leave them enabled on a Workstation system next to Flathub.
So, TL;DR, I recommend to leave only Flathub and RPM enabled, and check if the software is available on Flathub first before installing from RPM repositories.
Fixing Firefox
This section was added on the 13th July, 2024.
Out of the box, media playback may be hit-or-miss on the RPM version of Firefox. This is due to missing proprietary media codecs in the official repositories. The simplest way is to install Firefox from Flathub, where all proprietary media codecs are packaged with Firefox, but that comes with the downside that installing GNOME extensions in the browser doesn’t work anymore.
Instead, you can follow the official guide on RPM fusion on installing multimedia codecs and just keep the RPM version of Firefox. After installation, you may still notice that WebRTC doesn’t work, which is sometimes used for live video/audio streams. WebRTC is disabled by default in Firefox for some reason, but you can enable it by going to about:config and tweaking some parameters outlined in this section on Fedora Docs.
GNOME Extensions
If you installed Firefox as a Flatpak after following the previous section, you find that the GNOME browser extension no longer works. Maybe there is a Flatpak override that allows communication between the Flatpak Firefox and GNOME shell, but for now, a solid workaround is managing extensions with the extension manager.
AppIndicators
Otherwise known as tray icons, they are used by a lot of software (or am I allowed to say “apps” as well? :P). GNOME doesn’t show tray icons by default, so the AppIndicators GNOME extension is needed to display them.
If you come from other desktop environments, you might notice that left clicks do the same thing as a right click. It’s apparently done to match the GNOME style a bit better, but just keep in mind that you can always trigger a left click action by double clicking the tray icon.
Here’s a related GitHub issue thread:
https://github.com/ubuntu/gnome-shell-extension-appindicator/issues/25
Windows Fonts
The easiest way to get the full set of Windows Fonts is by copying them over from an existing Windows partition. The font files are located under C:\Windows\Fonts. I suggest to make a new directory in /usr/share/fonts/, something like /usr/share/fonts/WindowsFonts, to have the Windows fonts in one place after you copy them over.
Startup Applications
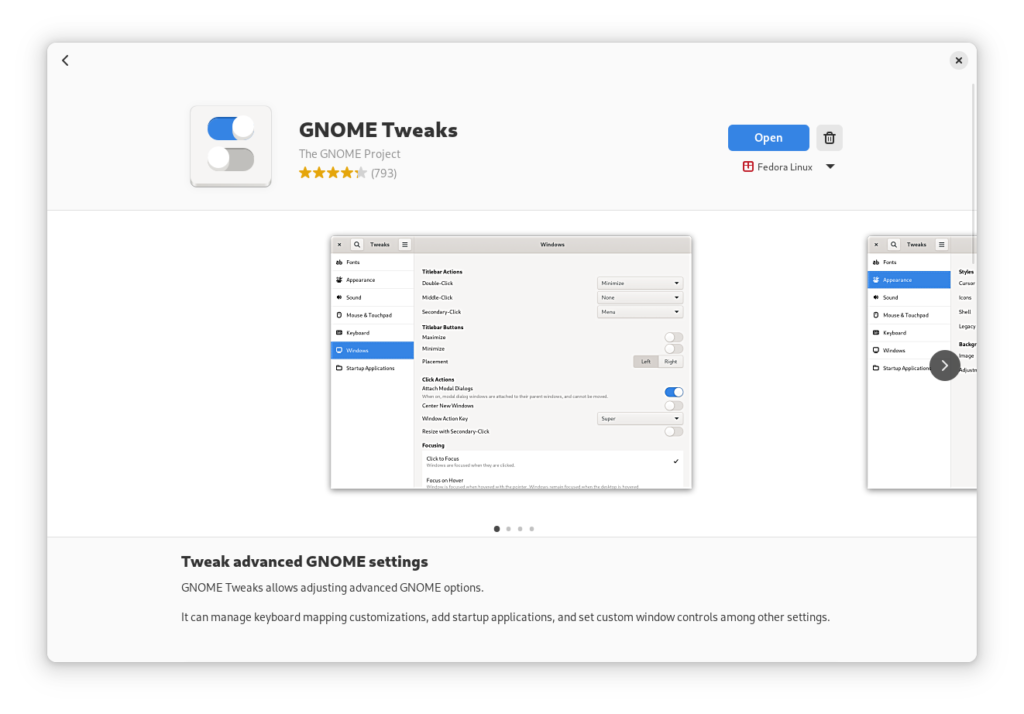
If you want to add or remove startup applications, get GNOME Tweaks from the RPM repositories.
CJK Font Preference
One thing that annoyed me that all Chinese characters in notifications don’t look nice. For I long time I thought this was just because the Chinese fonts included in Fedora just don’t look good, but it turns out Fedora was just displaying the Japanese variants of the characters. To change that, I created /etc/fonts/conf.d/05-language-fallback.conf with the following content.
<?xml version="1.0"?>
<!DOCTYPE fontconfig SYSTEM "urn:fontconfig:fonts.dtd">
<fontconfig>
<match target="pattern">
  <edit name="lang" mode="append">
    <string>zh-cn</string>
  </edit>
</match>
</fontconfig>
Change the locale code if needed!
Here is a forum thread where this problem was discussed:
https://discussion.fedoraproject.org/t/cjk-font-preference-configuration/96397/7
MangoHud
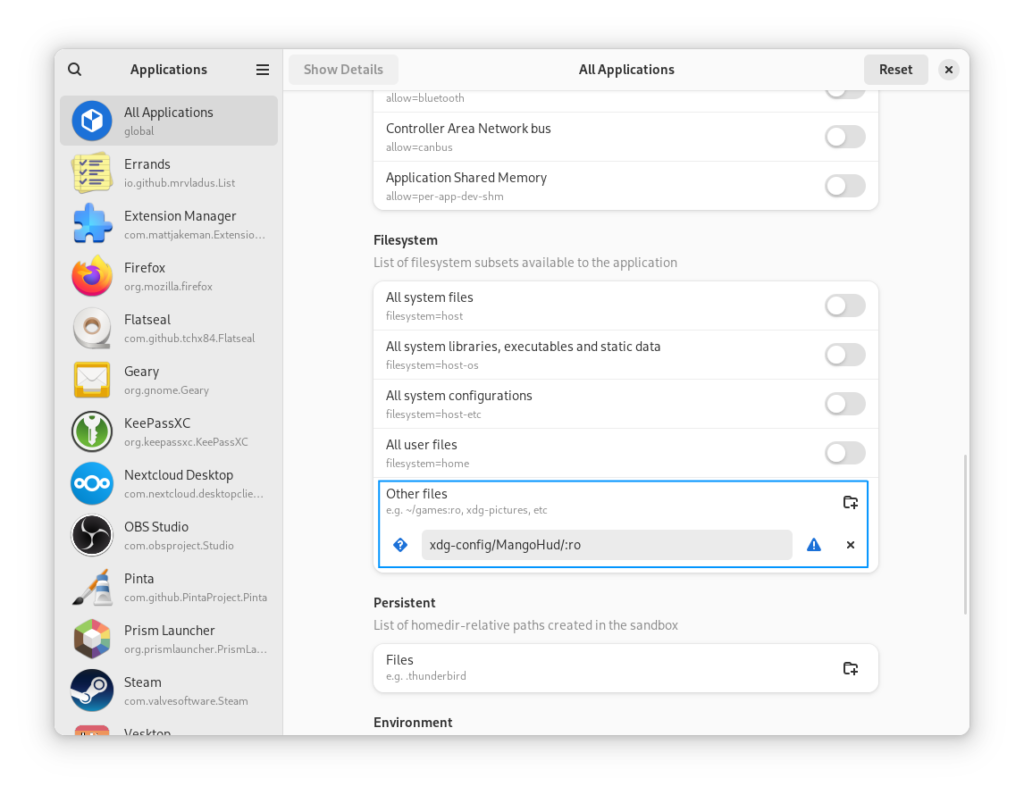
A kind of random recommendation, but in case you installed the Flatpak version of Steam, you can install MangoHud with this command:
flatpak install org.freedesktop.Platform.VulkanLayer.MangoHudFor configuration files in ~/.config/MangoHud/ to take effect, you need to add a filesystem override for at least the Steam Flatpak. I prefer to do this for all Flatpaks with read-only permissions, with the help of the tool Flatseal.
Final Words
You’ve made it! You have now installed Fedora Workstation with everything you need to get a flawless experience. Sit back, relax and enjoy your new system. This is a new blog of mine, so maybe you want to stay tuned of what comes next…
Leave a Reply
You must be logged in to post a comment.